
If you shoot e-commerce products at volume, the shot list is the document that keeps the day from turning into guesswork. It tells the photographer what to capture, tells the stylist what needs to be prepared, tells the retoucher what to expect, and tells the producer whether the job is actually finished.
When the shot list is unclear, the questions arrive on set: Which angles do we need? Is this one on-model or flat? Does the marketplace need a square crop? Has the sample even arrived? Every unanswered question slows the day down.
A useful shot list does not have to be complicated. It just has to give the team enough context to make the right decision without asking someone else every ten minutes.
The job of a shot list
Think of the shot list as the shared plan for one shoot day. It should answer three basic questions for every product.
First, what exactly are we shooting? The product needs a reliable ID, usually the SKU or style number, so the team can match the physical sample to the product data and the final file name. A friendly product name is useful too, but it should not replace the ID.
Second, what should the final image set include? This is where the list describes the angles, model needs, styling notes, lighting reference, and any retouching requirements. The more specific this is, the fewer decisions the photographer and retoucher have to make from memory.
Third, where will the images be used? A product page, marketplace, social crop, and print catalogue may all need different formats. If the destination is missing from the shot list, the team often discovers the problem at delivery, when it is much more expensive to fix.
The fields that matter most
Most teams start by asking, "Which columns should our template have?" A better question is, "What information does the team need before the product leaves the set?"
At minimum, the row should identify the product, show the required angles, explain styling or prop needs, name any model requirements, point to the lighting setup, flag retouching work, and state the final channel or destination.
That sounds like a lot, but each field prevents a common mistake. The product ID prevents files from being named against the wrong SKU. The angle list prevents "standard packshot" from meaning one thing to the photographer and another thing to the client. Styling notes prevent someone from adding a prop that was not approved for the season. Model notes prevent rights questions from appearing after the image has already been used.
The channel destination is especially important. If the image is going to both a D2C product page and a marketplace, the team may need different crops or backgrounds. Making that clear before capture is much easier than reworking hundreds of files later.
Different products need different instructions
One master shot list template usually becomes either too big or too vague. Apparel, accessories, hard goods, and beauty products need different kinds of guidance.
For apparel, the team usually needs to know whether the product is shot flat, on a mannequin, or on a model. Fit, size, fabric detail, and care-label readability may matter. The model information is not extra admin; it tells the team whether the image can be used in the right channels for the right period.
Accessories often need scale and use context. A bag may need an interior shot, a hardware close-up, and an image that shows size against a hand or prop. Without that instruction, the studio can finish a clean product shot and still miss the image marketing actually needed.
Hard goods need clarity around size, material, packaging, and assembly state. A lamp photographed boxed is a different asset from the same lamp fully assembled. A matte finish and a glossy finish may also need different lighting and retouch notes.
Beauty products often need label readability, swatches, cap-on and cap-off shots, and legal handling of batch codes. These details are easy to miss if beauty is forced into the same template as apparel.
The point is not to create four separate processes. The point is to start each category with the instructions that category actually needs.
What a useful row looks like

A good row reads like a clear instruction, not a database export.
For a denim style, the row might say: shoot front, back, three-quarter, back-pocket detail, and on-model size S. Use lighting setup A. Match color to the physical sample. Deliver 4:5 for the brand site and 1:1 for Zalando.
For a leather bag, the row might say: shoot front, back, open top-down, interior, hardware close-up, and one in-use image. Use the notebook as the scale prop. Clean up hardware highlights in retouch. Deliver both square and vertical crops.
For a ceramic mug, the row might say: shoot front, three-quarter, top-down, handle detail, packaging, and one image with coffee for context. Check for visible chips before approving the set. Deliver a white-background marketplace image as well as the brand-site crop.
Those examples are not there to make the list longer. They show what "ready to shoot" actually means. The photographer should not have to guess the angles, the retoucher should not have to guess the crop, and the producer should not have to ask whether the row is complete.
Why copied spreadsheets go wrong
Many studios still build the daily shot list by copying last campaign's spreadsheet. That can work for small jobs, but it breaks quickly when the assortment changes, a colorway is added, two samples are delayed, or a model window moves.
The issue is not that spreadsheets are bad. The issue is that a copied spreadsheet goes out of date the moment the real production plan changes.
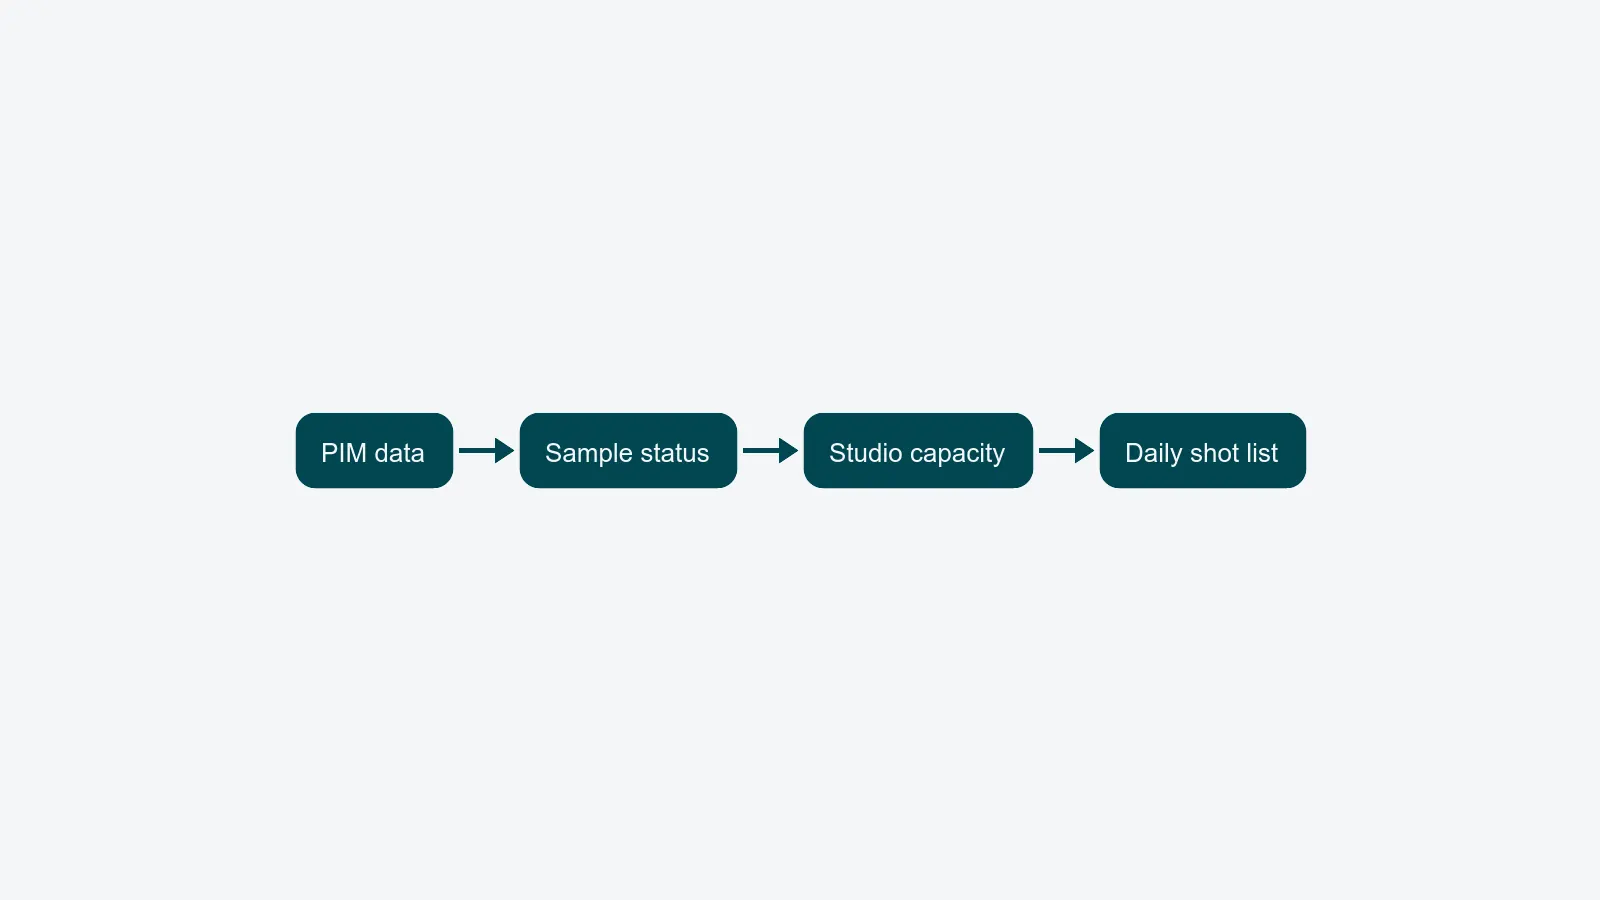
A stronger setup builds the shot list from the sources that already know the truth. The PIM knows the SKU list, names, colors, sizes, and product copy. Sample tracking knows what has physically arrived and is ready to shoot. The studio calendar knows which sets, models, and lighting setups are available. Channel rules know which crops and formats the final images need.
When those sources feed the shot list, the photographer walks onto set with a plan that matches the samples on the rack. The list is not based on what someone hoped would arrive. It is based on what is actually ready.
This is also where the tethered capture workflow starts to help. If the shot list and capture session use the same SKU data, files are much less likely to be named incorrectly.
Connect the list to samples and capacity
A shot list by itself is only a wish list. It becomes a production plan when it is tied to two things: samples and capacity.
Sample status matters because the studio cannot shoot what is not in the building. If a product is still at customs or has not been checked in, it should not appear as ready on the day's list. Connecting the shot list to sample management prevents photographers from waiting on products that were never available.
Capacity matters because not every shot takes the same amount of time or the same people. A day with 240 SKUs is not realistic if several products need a model who only arrives after lunch. The list should respect the actual windows for models, sets, and lighting changes, so the team can group similar work and avoid unnecessary resets.
Once the brief, samples, and calendar are connected, the rest of the packshot workflow becomes easier to manage. The workflow automation module is what keeps those pieces moving together.
Common mistakes to avoid
The most common mistake is writing "standard angles" and assuming everyone knows what that means. They usually do not. One photographer may shoot front and back. Another may include detail and three-quarter. The client may expect on-model. Write the angles down.
Another common mistake is treating rights information as a legal detail that can wait until delivery. Model release windows, prop licenses, and talent agency notes need to be visible when the image is captured. Otherwise, the team can create an asset that looks finished but cannot be used.
Studios also lose time when the shot list stops at "captured." A useful list includes simple checks for approval on set and approval after retouch. If those checks are missing, the team may not discover a problem until the sample has been returned.
Finally, avoid the "final version" spreadsheet problem. If several people are editing different copies of the shot list, nobody knows which version is true. The team needs one shared source of truth, not a file called FINAL_v3_USE_THIS.
Where to take this next
If the current shot list creates questions on set, the answer is probably not a prettier spreadsheet. The answer is a clearer plan that connects product data, sample status, and studio capacity before the shoot starts.
PixelAdmin builds shot lists from those sources and carries the same SKU-level link through capture, retouch, review, and delivery. If that sounds closer to what you have been trying to assemble out of generic tools, book a demo and we'll walk through your current shot list with you.